
A great way to view and understand your building or repair project before you get started. Find out just about everything you need to know by watching the video below.
The addition of stone veneer can turn an ordinary wall, column or fireplace into an elegant and distinctive home feature. With a little careful planning, creativity and puzzle-solving skills, stone veneer projects can be successfully achieved.
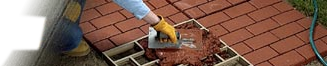
Gloves and safety glasses should always be worn when working with cement based products. QUIKRETE Veneer Stone Mortar, QUIKRETE Polymer Modified Veneer Stone Mortar or QUIKRETE Natural Stone Veneer Mortar may be used.
Step 1
Determine the quantity of stone you will need.
NOTE: to find the total square feet of veneer stone you will need, multiply the length of the area by the height. Then subtract the square footage of any window and door openings and corner pieces. It is always best to increase your estimate by 5 to 10 percent to allow for cutting and trimming.
Step 2
Attach two layers of Grade D, waterproof building paper using galvanized nails or staples in a shingled fashion over the wall sheathing extending 16 inches around all corners.
TIP: vertical seams should be overlapped by 6 inches and horizontal seams should be overlapped by 4 inches.
Step 3
Install a galvanized, self-furring, expanded metal lath or 1” woven wire stucco netting over the entire surface also extending 16 inches around all corners. The lath or stucco netting should over-lap by 1” on the horizontal seams and 2” on the vertical seams.
NOTE: galvanized nails or staples should be used every 6 inches both vertically and horizontally and should penetrate the studs a minimum of 1 inch.
Step 4
Spread out the veneer stone on the ground in order to layout your stone pattern.
NOTE: if you need to trim a stone to fit your pattern, use a mason’s hammer or a wide-mouth nipper to reshape the edges of the stone
Step 5
Mix a batch of mortar to a firm, workable consistency - properly prepared mortar will hang on a trowel held at a 90 degree angle.
NOTE: QUIKRETE Veneer Stone Mortar (use for the application of all types of manufactured stone); QUIKRETE Polymer Modified Veneer Stone Mortar (use in dry-stack stone applications and wet conditions); QUIKRETE Natural Stone Veneer Mortar (use with natural stone)
Step 6
Apply 1/2 inch of mortar to a 5 square foot area using a square trowel. Press the mortar firmly into the lath.
Step 7
Scratch or score the surface in a horizontal direction using a steel bristle brush or metal rake. Continue applying the scratch coat until the work area is completed. Allow the mortar to set hard.
Step 8
Dampen the back of each stone and apply about 1/2 inch of mortar to the entire back of the stone.
Step 9
Press the stone firmly against the scratch coat, rotating the stone slightly into position until mortar squeezes out.
Step 10
Work from the base of the wall, positioning each stone so that the joints are no wider than about a 1/2 inch and keep the joint width consistent throughout the wall.
TIP: try to avoid smearing excess mortar on the stone. Remove excess mortar by allowing it to dry and brushing away with a whisk brush. A wet sponge or brush should never be used to remove the excess mortar because it will cause staining that will be difficult to remove.
Step 11
Fill in the joints with veneer stone mortar using a grout bag.
Step 12
Remove any excess mortar using a jointing tool once the mortar joints have become thumb print hard.
Step 13
Smooth and compact the mortar joints.