

Cost:
Skill:
Time:
Tools
Excavation and site preparation tools, QUIKRETE® Walkmaker form, wheelbarrow or mixing box, shovel, level, margin trowel or finishing trowel.
Materials Concrete mix or crack-resistant concrete mix, liquid cement color, plastic sheeting, polymer-modified jointing sand.
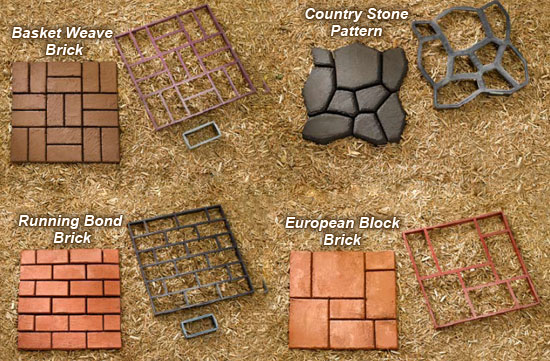
A well-made walkway or garden path not only stands up to years of hard use, it enhances the natural landscape and complements a home’s exterior features. While traditional walkway materials like brick and stone have always been prized for both appearance and durability, most varieties are quite pricey and often difficult to install. As an easy and inexpensive alternative, you can build a new concrete path using manufactured forms. The result is a beautiful pathway that combines the custom look of brick or natural stone with all the durability and economy of poured concrete.
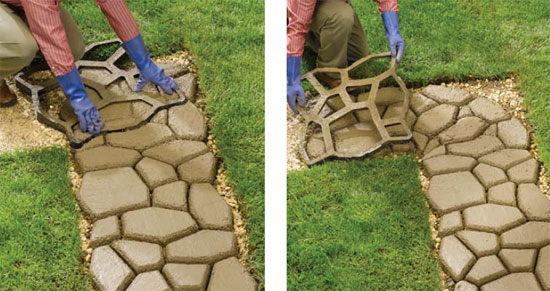
Building a path is a great do-it-yourself project. Once you’ve laid out the path, you mix the concrete, set and fill the form, then lift off the form to reveal the finished design. After a little troweling to smooth the surfaces, you’re ready to create the next section—using the same form. Simply repeat the process until the path is complete. Each form creates a section that’s approximately 2-ft. sq. using one 80-lb. bag of premixed concrete. This project shows you all the basic steps for making any length of pathway, plus special techniques for making curves, adding a custom finish, or coloring the concrete to suit your personal design.
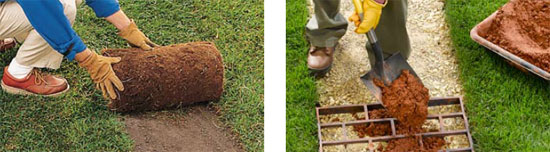
1. Prepare the project site by leveling the ground, removing sod or soil as needed. For a more durable base, excavate the area and add 2 to 4" of compactible gravel. Grade and compact the gravel layer so it is level and flat.
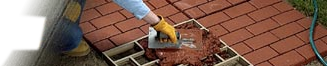
2. Mix a batch of concrete for the first section, following the product directions (see page 33 to add color, as we have done here). Place the form at the start of your path and level it, if desired. Shovel the wet concrete into the form to fill each cavity. Consolidate and smooth the surface of the form using a concrete margin trowel.

3. Promptly remove the form, and then trowel the edges of the section to create the desired finish (it may help to wet the trowel in water). For a nonslip surface, broom the section or brush it with a stiff brush. Place the form against the finished section and repeat steps 2 and 3 to complete the next section. Forms can be rotated to vary pattern.
4. After removing each form, remember to trowel the edges of the section to create the desired finish. Repeat until the path is finished. If desired, rotate the form 90° with each section to vary the pattern. Dampcure the entire path for five to seven days
After removing the form from a freshly poured section, reposition the form in the direction of the curve and press down to slice off the inside corner of the section (photo left). Trowel the cut edge (and rest of the section) to finish. Pour the next section following the curve (photo right). Cut off as many sections as needed to complete the curve.
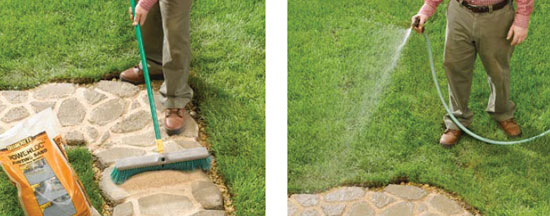
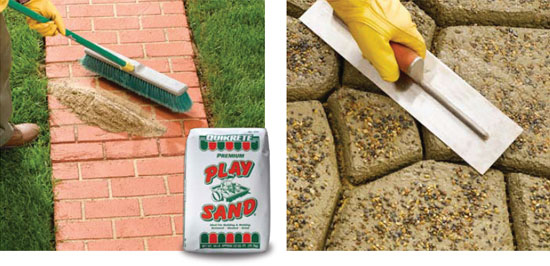
Sprinkle the area around the joint or joints between pavers with polymer-modified jointing sand after the concrete has cured sufficiently so that the sand does not adhere. Sweep the product into the gap to clean the paver surfaces while filling the gap.
Next, simply mist the jointing sand with clean water, taking care not to wash the sand out of the joint. Once the water dries, the polymers in the mixture will have hardened the sand to look like a mortar joint. Refresh as needed.
Use QUIKRETE® PowerLoc jointing sand in place of play sand to simulate mortar joints. Sweep the polymer-modified sand into the joints, mist with water, and Powerloc will harden in place.
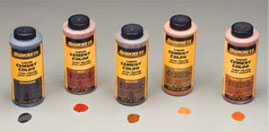
Coloring gives molded concrete a more natural looking finish and is great for blending your path or walkway into your landscape design. Adding colorant to the concrete mix is the easiest method and produces consistent results:
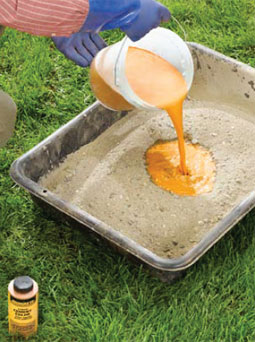
1. For every two 60-lb. or 80-lb. bags of dry concrete mix, first blend one 10 ounce bottle of QUIKRETE® liquid cement color with 5 quarts of clean water. Mix the liquid into the dry concrete until the color is uniform. Add more clean water as needed to achieve the desired consistency.
2. After placing and finishing the path sections, cure the concrete carefully to produce the best color quality. If curing conditions will be less than ideal, apply QUIKRETE® concrete sealer to ensure slow, even curing and good coloring.
Fill walkway joints with sand or mortar mix to mimic the look of hand-laid stone or brick. Sweep the sand or dry mortar into the section contours and spaces between sections. For mortar, mist the joints with water so they harden in place.
Create custom surface finishes by pressing small stones or pea gravel into the wet concrete or by brushing on a layer of sand. Apply finish materials after the concrete has reached its initial set (thumb print hard) but is still damp—approximately one hour after placing.