

A great way to view and understand your building or repair project before you get started. Find out just about everything you need to know by watching the video below.
Casting concrete vases is an easy, smaller-scale project that allows you to incorporate the modern aesthetic of concrete décor into your home’s design through ornamentation.
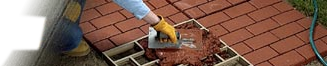
When working with cement-based products, always wear eye protection and waterproof gloves.
Step 1
Cut off the bottom of the plastic bottles.
TIP: If using a glass bottle, make sure it has a wide mouth so that it may be filled from the top.
Step 2
Drill a hole in the caps of the bottles. Make sure that it will tightly accommodate a pen, candle or a test tube.
Step 3
Mix the concrete and spoon it into the bottles. Make sure to push the wet concrete down into the bottle.
TIP: Make sure the bottles are clean, before pouring. Also, place them in a stationary position where they can be filled without falling over.
Step 4
Vibrate the full bottles to bring any air bubbles to the surface
Step 5
Allow the concrete to cure for at least 24 hours. Then, remove the plastic bottles with a box cutter and diagonal pliers.
TIP: If cast in glass, the bottle will need to be broken, to release the vase. Wait at least 4 days before removing glass bottles, so that the concrete can cure and reach a higher strength. Then, lightly tap the glass with a hammer.
Step 6
Remove the pen, candle or test tube.
TIP: To remove the pen or candle, try applying heat before removing it. For the test tubes, use the diagonal pliers to crush them into fragments that can be poured out.