

A great way to view and understand your building or repair project before you get started. Find out just about everything you need to know by watching the video below.
For centuries, Stucco has proven to be one of the most enduring, versatile and weather resistant exterior wall finishes available - with its variety of colors and textures, stucco continues to be one of the most popular wall systems.
Step 1
Attach two layers of Grade D, waterproof building paper using galvanized nails or staples in a shingled fashion over the wall sheathing extending 16 inches around all corners.
TIP: vertical seams should be overlapped by 6 inches and horizontal seams should be overlapped by 4 inches.
Step 2
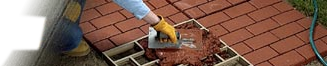
Install trim accessories.
TIP: trim accessories can be cut to size using metal snips but are often very sharp, so always wear gloves when working with these materials.
Step 3
Install casing beads.
TIP: casing beads for a 3 coat system should be 3/4 inch thick; casing beads for a 1 or 2 coat system should be 1/2 inch thick.
Step 4
Install a galvanized, self-furring, expanded metal lath or 1” woven wire stucco netting over the entire surface also extending 16 inches around all corners. The lath or stucco netting should over-lap by 1” on the horizontal seams and 2” on the vertical seams.
NOTE: galvanized nails or staples should be used every 6 inches both vertically and horizontally and should penetrate the studs a minimum of 1 inch.
Step 5
Place control joints to create wall panels no larger than 144 square feet. Keep the panels as square as possible.
Step 6
Place expansion joints anywhere there exists wall expansion joints.
Step 7
Install corner trim on all outside edges to protect the exposed stucco and to provide clean finished lines.
Step 8
Mix the base coat stucco to a workable consistency.
NOTE: the proper consistency is achieved when the stucco will “hang” on a trowel held at a 90 degree angle - stucco that is too wet will sag; stucco that is too dry will not adhere properly to the metal lath.
Step 9
Apply the base coat stucco using a square trowel held at a 45 degree angle. Use firm trowel pressure to force the stucco into the lath. Work from the bottom of the wall up and apply at a thickness of about 3/8 inch over the entire area.
NOTE: for one coat stucco systems, apply QUIKRETE One Coat Fiberglass Reinforced Stucco in a single application at ½ inch thick.
Step 10
Screed the stucco to a uniform depth of 3/8 inch using a straight edge.
Step 11
Scratch 1/8 inch deep horizontal grooves into the base coat with a raking tool once the stucco has become thumb-print hard.
Step 12
Cure the scratch coat for 24 to 48 hours.
Step 13
Mix and apply another 3/8 inch layer of base coat stucco directly to the scratch coat.
Step 14
Screed the surface using a straight board or darby to 3/8 inch thickness and fill any surface voids with additional base coat. The total combined basecoat depth should be 3/4 of an inch thick.
Step 15
Float the surface uniformly once the stucco has lost its sheen using a wooden trowel and cure the base coat with a fine water mist for 24-48 hours.
Step 16
Apply a 1/8 inch thick coating of QUIKRETE Finish Coat Stucco in the preferred application working from the bottom of the wall to the top. Complete the entire wall in one application.
NOTE: it is important to keep the surface damp for by applying a fine water mist over several days.
Step 17
Fill all control joints, expansion joints and gaps with a backer rod and QUIKRETE non-sag Polyurethane Sealant.