

A great way to view and understand your building or repair project before you get started. Find out just about everything you need to know by watching the video below.
Building an outdoor potting counter with QUIKRETE is a project that adds sustainability to your backyard landscape, as well as function - doubling as a cooking station for cookouts.
When working with cement-based products, always wear eye protection and waterproof gloves.
Step 1
Cut the melamine and erase board to preferred size and lengths.
Step 2
Glue together the melamine and erase board to form the mold for the countertop. Reinforce with spare blocks, if needed.
Step 3
Measure and hot glue form and fittings for the sink.
Step 4
Seal the edges and corners with silicone caulk. Remove any excess.
Step 5
Cut rigid foam insulation to preferred size, place on wood planks and screw the planks to the top of the form.
Step 6
Cut wire mesh to size.
Step 7
Mix QUIKRETE Countertop Mix, according to the directions on the back of the bag, and place the first lift.
>QUIK-Tip: Add liquid cement color to mixing water, before mixing the concrete, for a personalized look.
Step 8
Position the wire mesh, and finish with remaining concrete.
QUIK-Tip: Use a dowel to push concrete to bottom of the form and into each of the edges and corners.
Step 9
Screed and finish the concrete.
Step 10
Vibrate out any remaining air bubbles.
>QUIK-Tip: Use an orbital sander, without a pad, for this step.
Step 11
Cover with visqueen, and let the countertop set for at least 18 hours.
Step 12
Strip the forms.
QUIK-Tip: Drill holes in the melamine, to help it release.
Step 13
Place concrete block in the desired arrangement, and stack to the preferred height.
QUIK-Tip: Most exterior slabs are set at an angle, in order to drain. To counteract this, place a leveling course of QUIKWall, directly on the slab, before placing your first course of block. This will also help to bond the structure to the slab.
Step 14
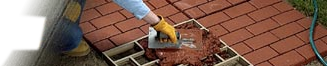
Mix the QUIKWALL, according to the directions on the back of the bag, and cover the exterior of the block by applying with a trowel at a 45 degree angle.
QUIK-Tip: For full instructions on how to apply QUIKWALL, click here (https://www.quikrete.com/athome/video-dry-stack-wall.asp)
Step 15
Let cure. Then, place the countertop on top of the base structure.
Step 16
Affix L brackets with QUIKRETE Construction Adhesive dispensed from a caulk gun, and let cure at least 4 hours, before applying weight.
>QUIK-Tip: QUIKWALL must cure for 30 days, before you can apply brackets. Reduce wait time by applying the brackets directly to the concrete block, before placing QUIKWALL.
Step 17
Build and place the wooden shelves atop the L brackets.
Step 18
Seal the countertops with QUIKRETE Waterproofing Sealer.
Step 19
Attach the sink fixtures, connect the hose and splitter, and place the watering can.