
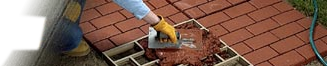

Add curb appeal to your home with concrete borders or edging that give a clean, finished look to your landscaping by defining your lawn, flower beds and pathways. Watch the video, to learn how.
When working with cement-based products, always wear eye protection and waterproof gloves.
Step 1
Remove any landscaping materials like stray and mulch from the desired border path.
Step 2
Use a shovel to dig an outline of the border location.
Step 3
Excavate the outlined area, digging a trench ½” to 1” deeper than your border, and level the bottom, using a square nosed shovel.
QUIK-Tip: Make the sides of the trench as vertical as possible to help support the forms.
Step 4
Construct the forms, cutting ¼” plywood strips.
Step 5
Secure the forms in place by hammering wood stakes into the ground snugly on the outside (and inside) of the forms. Then screw the stakes to the forms from the inside.
QUIK-Tip: Maintain a consistent width of the forms by placing spacers at regular intervals. Make sure the spacers are pushed down to the bottom of the form before pouring the concrete.
Step 6
Once the forms are complete, compact the ground under the forms and pour a base layer of QUIKRETE All-Purpose Gravel between the forms.
Step 7
Mix QUIKRETE Crack Resistant Concrete Mix following the directions on the bag and pour into the forms. The concrete should slightly overfill the form.
Step 8
After placing a few batches in the form, use a wood float to consolidate and level the concrete even with the top of the form.
Step 9
Use an edging tool to consolidate and shape the edges of the concrete border.
Step 10
Cut in control joints about every eight feet using a margin trowel.
Step 11
Water cure the concrete for a minimum of 3 – 5 days using a fine water mist.
QUIK-Tip:This step can be eliminated by applying QUIKRETE Acrylic Concrete Cure N’ Seal to freshly placed concrete with a brush, roller or garden sprayer. In addition to helping the curing process, the sealer also protects the concrete border from stains.
Step 12
Carefully remove the forms starting with the stakes. Then, remove the plywood strips.
QUIK-Tip:The tip of a pointed shovel can be used to pry up stingy plywood strips, but be carefully not to crack the concrete by applying to much force.
Step 13
Backfill with soil and replace any landscaping materials.