Rope, carpenter’s square, hand maul, tape measure, mason’s string, line level, spade, sod cutter, straightedge, level, wheelbarrow, shovel, hand tamper, circular saw, drill, paintbrush, concrete finishing tools, stiff-bristled broom.
2 × 4 lumber, 3" screws, compactible gravel, vegetable oil or commercial release agent, concrete mix or crack-resistant concrete mix, acrylic cure & seal.
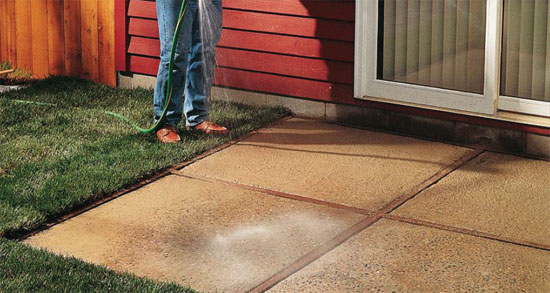
A poured concrete patio can be a gray, utilitarian slab or it may be a highly decorative focal point of your backyard living environment. By including a decorative finishing technique in your plans, such as exposed aggregates or etching with acid stain, your design options are virtually unlimited. A concrete patio also may serve as a subbase for a mortared flagstone, tile, or paver patio.
Building a concrete patio (or any concrete slab) is similar in many ways to the walkway project. Before beginning your project be sure and read through these pages for additional information, particularly on the subjects of finishing and curing. If your patio is larger than 10 ft. x 10 ft., you will definitely need to include control joints. You’ll also want to consider buying or renting a power concrete mixer—see the quantity calculator for estimating how many bags of concrete your patio will require.
|
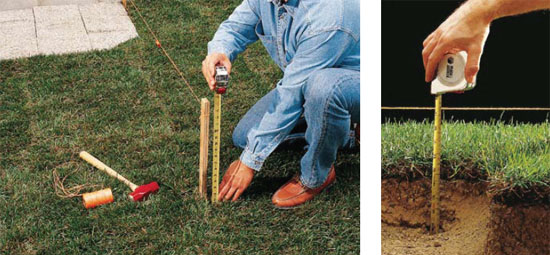
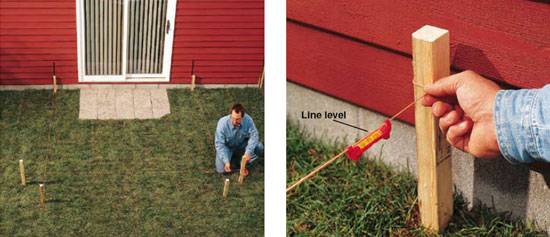
| Measure the slope of the patio to determine if you need to do grading work before you start your project. First, drive stakes at each end of the project area. Attach a mason’s string between the stakes and use a line level to set it at level. At each stake, measure from the string to the ground. The difference between the measurements (in inches) divided by the distance between stakes (in feet) will give you the slope (in inches per foot). If the slope is greater than 1" per foot, you may need to regrade the site. |
|
| Dig a test hole to the planned depth so you can evaluate the soil conditions and get a better idea of how easy the excavation will be. Sandy or loose soil may require amending; consult a landscape engineer. |
|
|
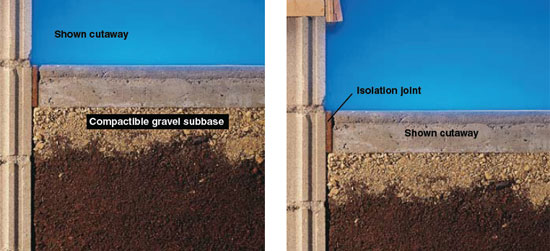 |
| Add a compactible gravel subbase to provide a level, stable foundation for the concrete. The compactible gravel also improves drainage—an important consideration if you are building on soil that is high in clay content. For most building projects, pour a layer of compactible gravel about 5" thick, and use a tamper to compress it to 4". |
|
| When pouring concrete next to structures, glue a 1⁄2"-thick piece of asphalt-impregnated fiber board to the adjoining structure to keep the concrete from bonding with the structure. The board creates an isolation joint, allowing the structures to move independently, minimizing the risk of damage. |
|
|
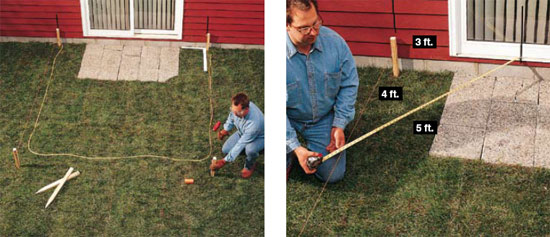 |
| Lay out a rough project outline with a rope or hose. Use a carpenter’s square to set perpendicular lines. To create the actual layout, begin by driving wood stakes near each corner of the rough layout. The goal is to arrange the stakes so they are outside the actual project area, but in alignment with the borders of the project. Where possible, use two stakes set back 1 ft. from each corner, so strings intersect to mark each corner (below). Note: In projects built next to permanent structures, the structure will define one project side. |
|
| Connect the stakes with mason’s strings. The strings should follow the actual project outlines. To make sure the strings are square, use the 3-4-5 triangle method: measure and mark points 3 ft. out from one corner along one string, and 4 ft. out along the intersecting string at the corner. Measure between the points, and adjust the positions of the strings until the distance between the points is exactly 5 ft. A helper will make this easier. |
|
|
 |
| Reset the stakes, if necessary, to conform to the positions of the squared strings. Check all corners with the 3-4-5 method, and adjust until the entire project area is exactly square. This can be a lengthy process with plenty of trial and error, but it is very important to the success of the project, especially if you plan to build on the concrete surface. |
|
| Attach a line level to one of the mason’s strings to use as a reference. Adjust the string up or down as necessary until it is level. Adjust the other strings until they are level, making sure that intersecting strings contact one another (this ensures that they are all at the same height relative to ground level). |
|
|
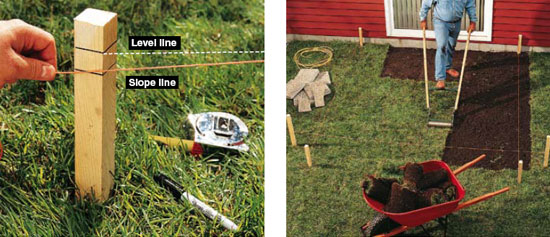 |
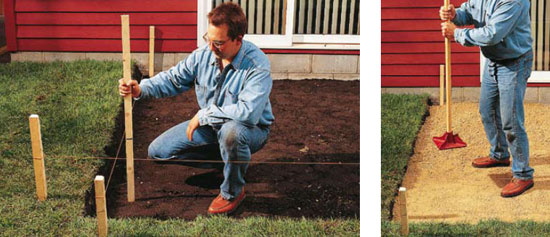
| To direct water runoff, most concrete surfaces should have a slight slope, especially if they are near your house. To create a slope, shift the level mason’s strings on opposite sides of the project downward on their stakes (the lower end should be farther away from the house). To create a standard slope of 1⁄8" per ft., multiply the distance between the stakes on one side (in feet) by 1⁄8. For example, if the stakes were 10 ft. apart, the result would be 10⁄8 (11⁄4"). You would move the strings down 11⁄4" on the stakes on the low ends. |
|
| Start excavating by removing the sod. Use a sod cutter if you wish to reuse the sod elsewhere in your yard (lay the sod as soon as possible). Otherwise, use a square-end spade to cut away sod. Strip off the sod at least 6" beyond the mason’s strings. The subbase should extend at least 6" beyond the project area. You may need to remove the strings temporarily for this step. |
|
|
 |
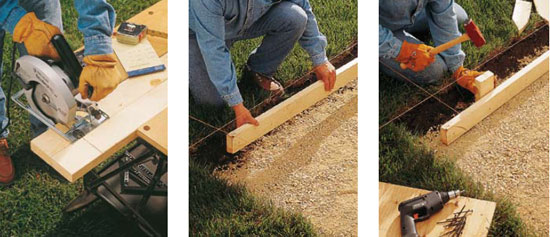
| Make a story pole as a guide for excavating the site. First, measure down to ground level from the high end of a slope line. Add 71⁄2" to that distance (4" for the subbase material and 31⁄2" for the concrete if you are using 2 × 4 forms). Mark the total distance on the story pole, measuring from one end. Remove soil from the site with a spade. Use the story pole to make sure the bottom of the site is consistent (the same distance from the slope line at all points) as you dig. Check points at the center of the site using a straightedge and a level placed on top of the soil. |
|
| Lay a subbase for the project (unless it requires a frost footing). Pour a 5"-thick layer of gravel, and tamp until the gravel is even and compressed to 4" in depth. |
|
|
 |
| A form is a frame, usually made from 2 × 4 lumber, laid around a project site to contain poured concrete and establish its thickness. Cut 2 × 4s to create a frame with inside dimensions equal to the total size of the project. |
|
| Use the mason’s strings that outline the project as a reference for setting form boards in place. Starting with the longest form board, position the boards so the inside edges are directly below the strings. |
|
| Cut several pieces of 2 × 4 at least 12" long to use as stakes. Trim one end of each stake to a sharp point. Drive the stakes at 3-ft. intervals at the outside edges of the form boards, positioned to support any joints in the form boards. |
|
|
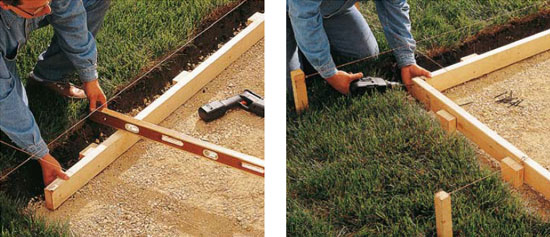 |
| Drive 3" Deck Screws through the stakes and into the form board on one side. Set a level so it spans the staked side of the form and the opposite form board, and use the level as a guide as you stake the second form board so it is level with the first. For large projects, use the mason’s strings as the primary guide for setting the height of all form boards. |
|
Once the forms are staked and leveled, drive 3” deck screws at the corners. Coat the insides of the forms with vegetable oil or a commercial release agent so concrete won’t bond to them.
Tip: Tack nails to the outsides of the forms to mark locations for control joints. |
|
|
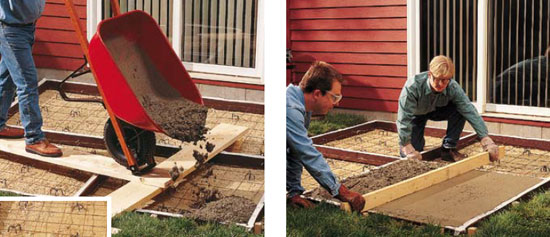 |
| Install reinforcement (optional) such as rebar and rewire set on bolsters (inset photo), and then mix and pour the concrete. The use of fiber-reinforced crack-resistant concrete eliminates the need for wire reinforcing mesh. |
|
| Screed concrete level with the forms. Use a 2 x 4 in a sawing motion to level and remove excess concrete. |
|
|
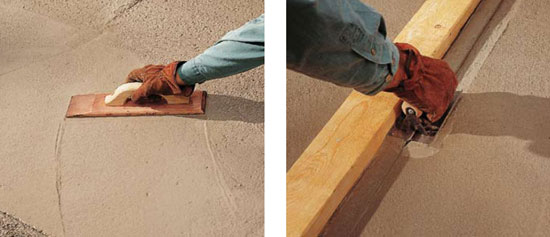 |
| Float the concrete surface to create a surface that is both smooth and skid resistant. Wait until bleed water has disappeared before proceeding. Finish options include a broomed finish, a smooth steel-trowel finish or seed with small aggregate after floating. |
|
Cut control joints in larger patios. Lay a 2 x 4 straightedge guide on the surface and carefully tool control joints using a grooving tool. Allow the concrete
to dry until sheen disappears, and then treat with acrylic cure and seal. |
|
|
|
|


